R and RStudio setup
To participate in the lab sessions, you need to install R and RStudio on your computer. You can download R from CRAN and RStudio from RStudio. Both are free to use.
R setup
Once you have installed both R and RStudio, open up RStudio. You should see something like this, with four panes:
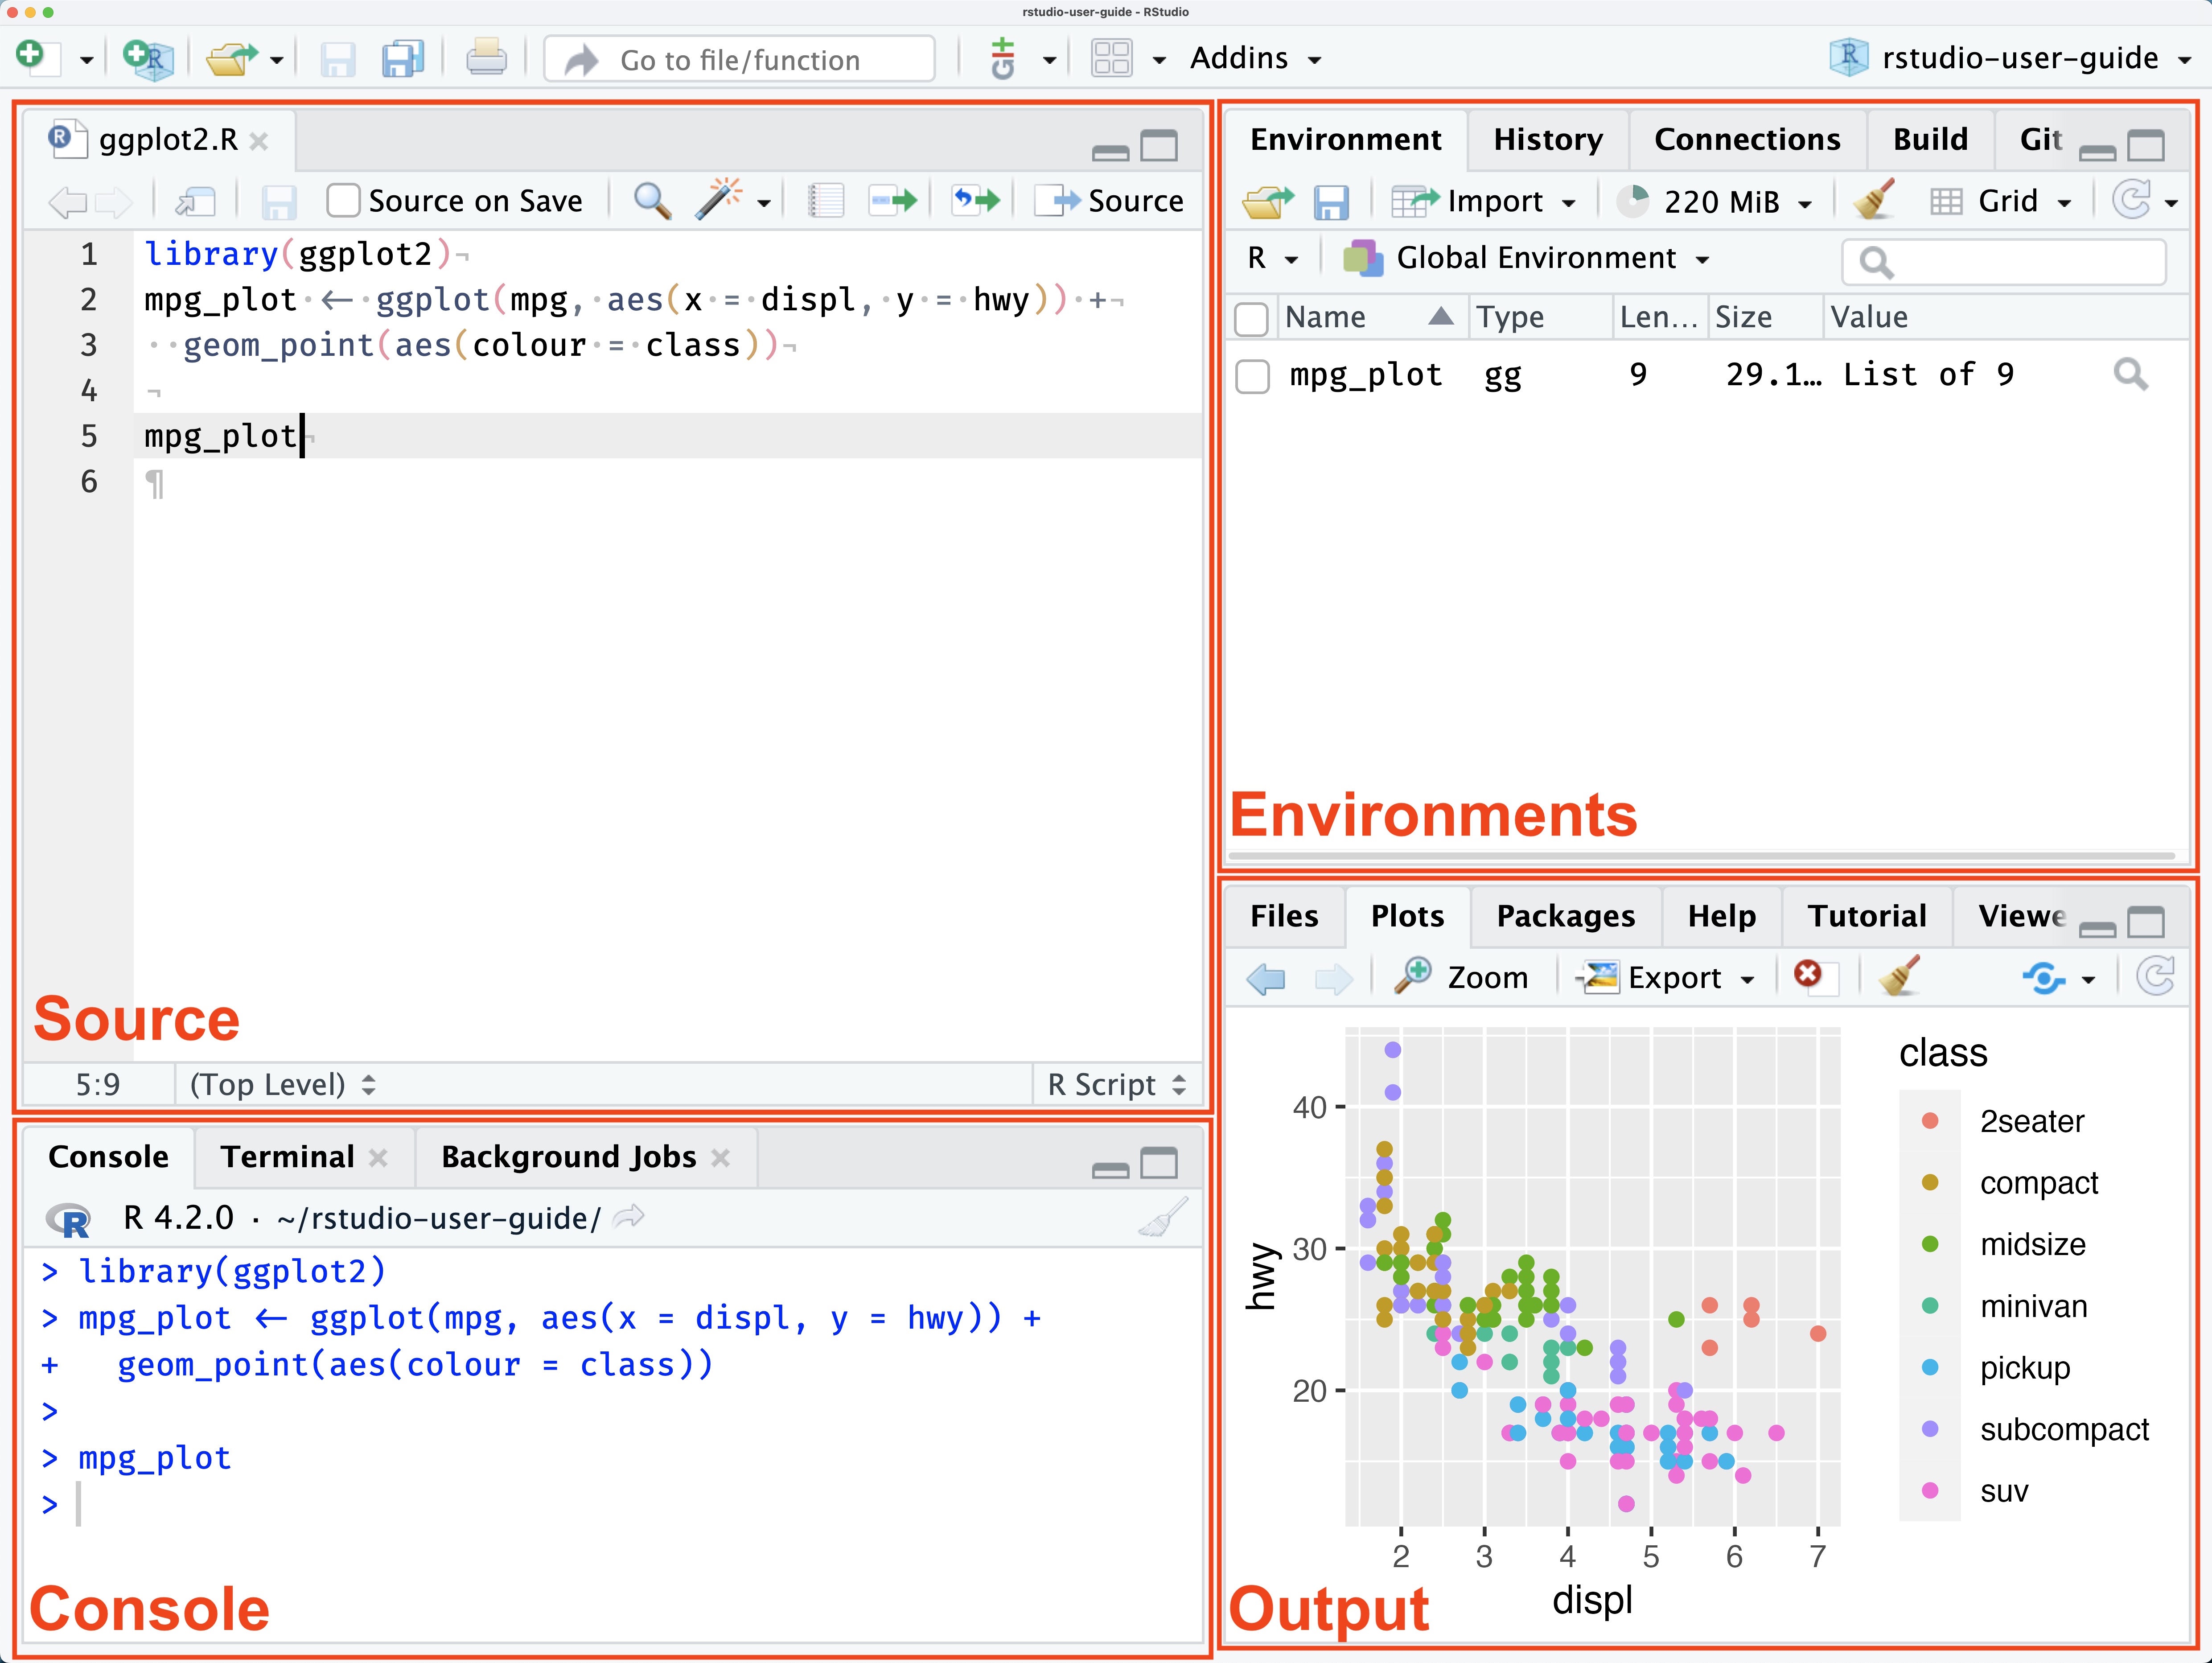
- Source pane (top-left): This is where you write and execute your scripts.
- Console pane (bottom-left): This is the interactive console where you see the output from your scripts. You can also type commands directly into the console.
- Environment pane (top-right): This is where you can see the objects in your workspace. If you load data, create functions, or anything else, it will appear here. There are multiple tabs but we will mostly use the default “Environment” tab.
- Output pane (bottom-left): Here you can see files in your working directory, see plots, and read help pages for functions or packages.
Execute a test command in the R console
If both R and RStudio are installed and talking to each other, you should see something like this in the Console pane:
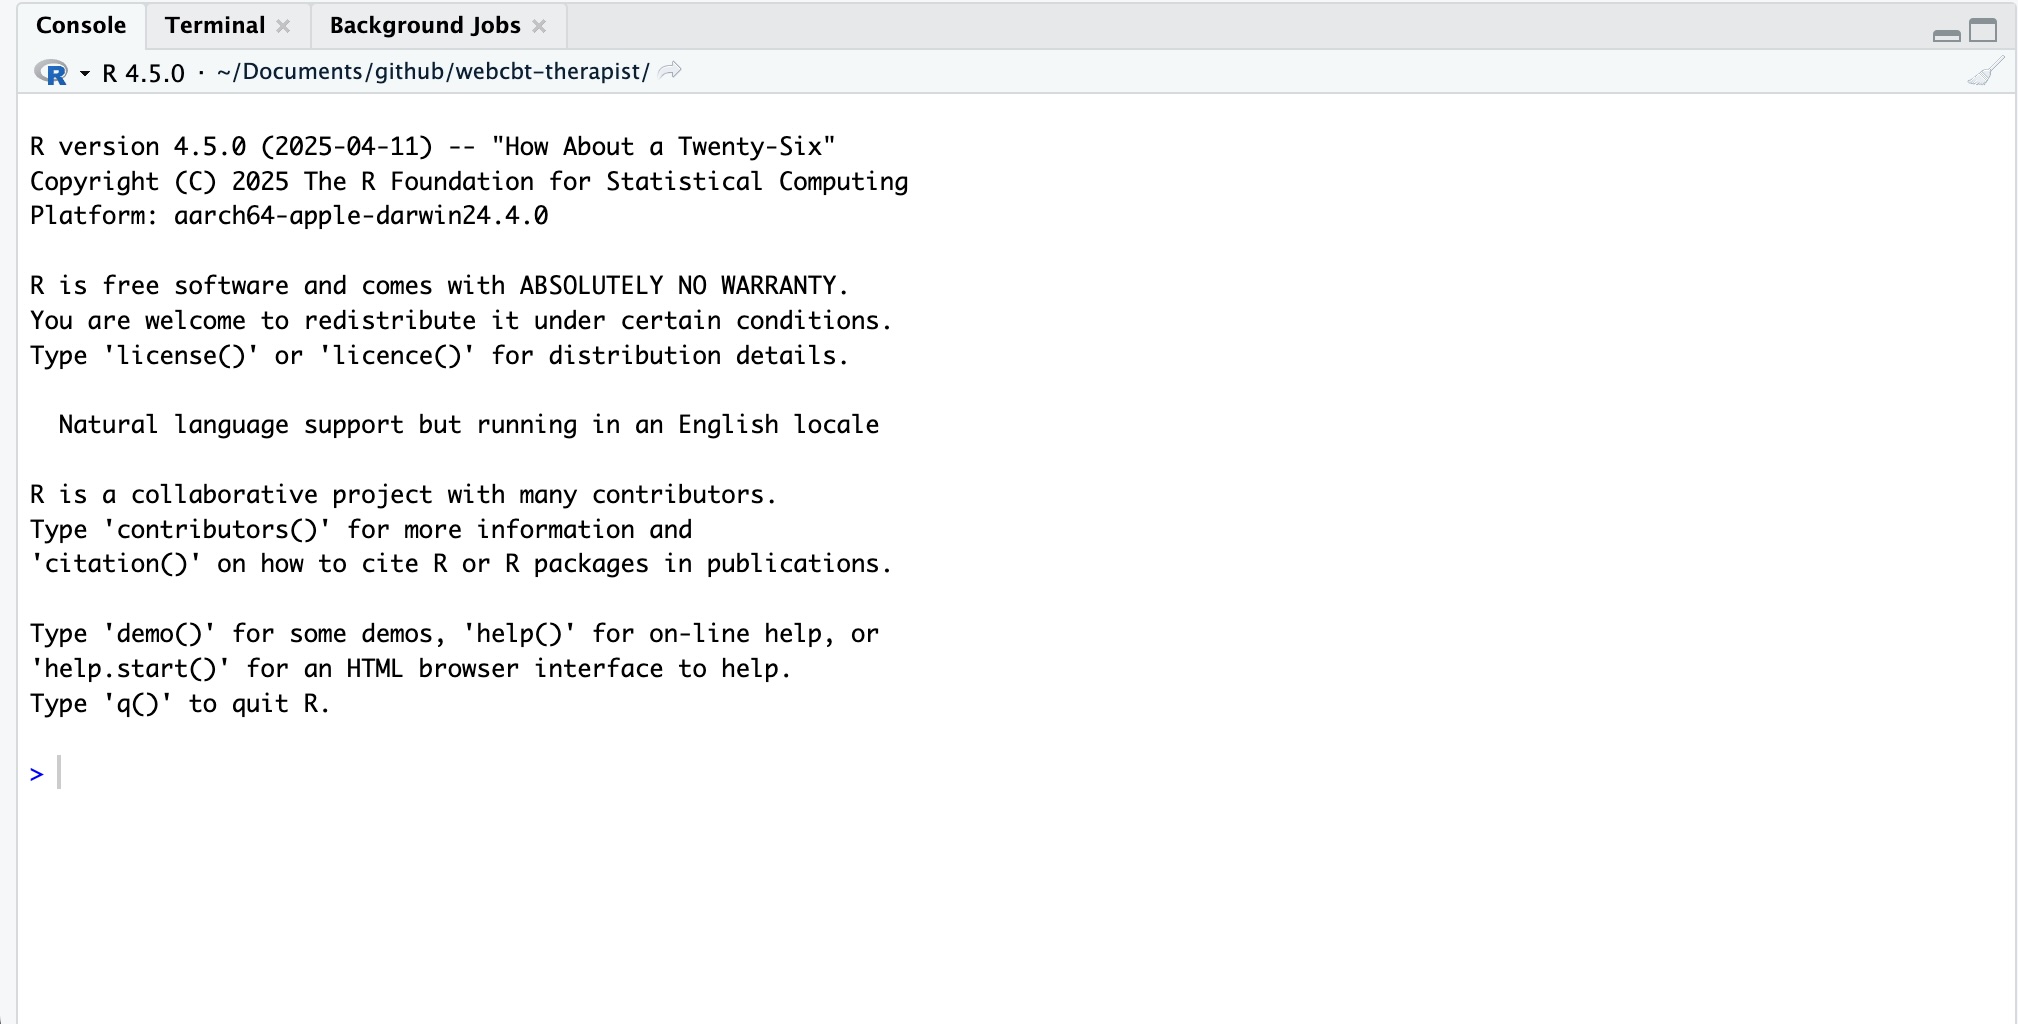
Try running a simple command to see that R is working. For example, type 1 + 1 and press enter, or try print("Hello, world!"). If you see the output below, you are good to go! See the steps below for setting up RStudio.
RStudio setup
Disable saving workspace and history
There are a few things we want you to change in the default RStudio settings. To access the settings in RStudio, go to Tools -> Global Options... in the menu bar or press Cmd + , (Mac) or Ctrl + , (Windows/Linux). Then navigate to the General tab. Make sure to set the options according to the image below:
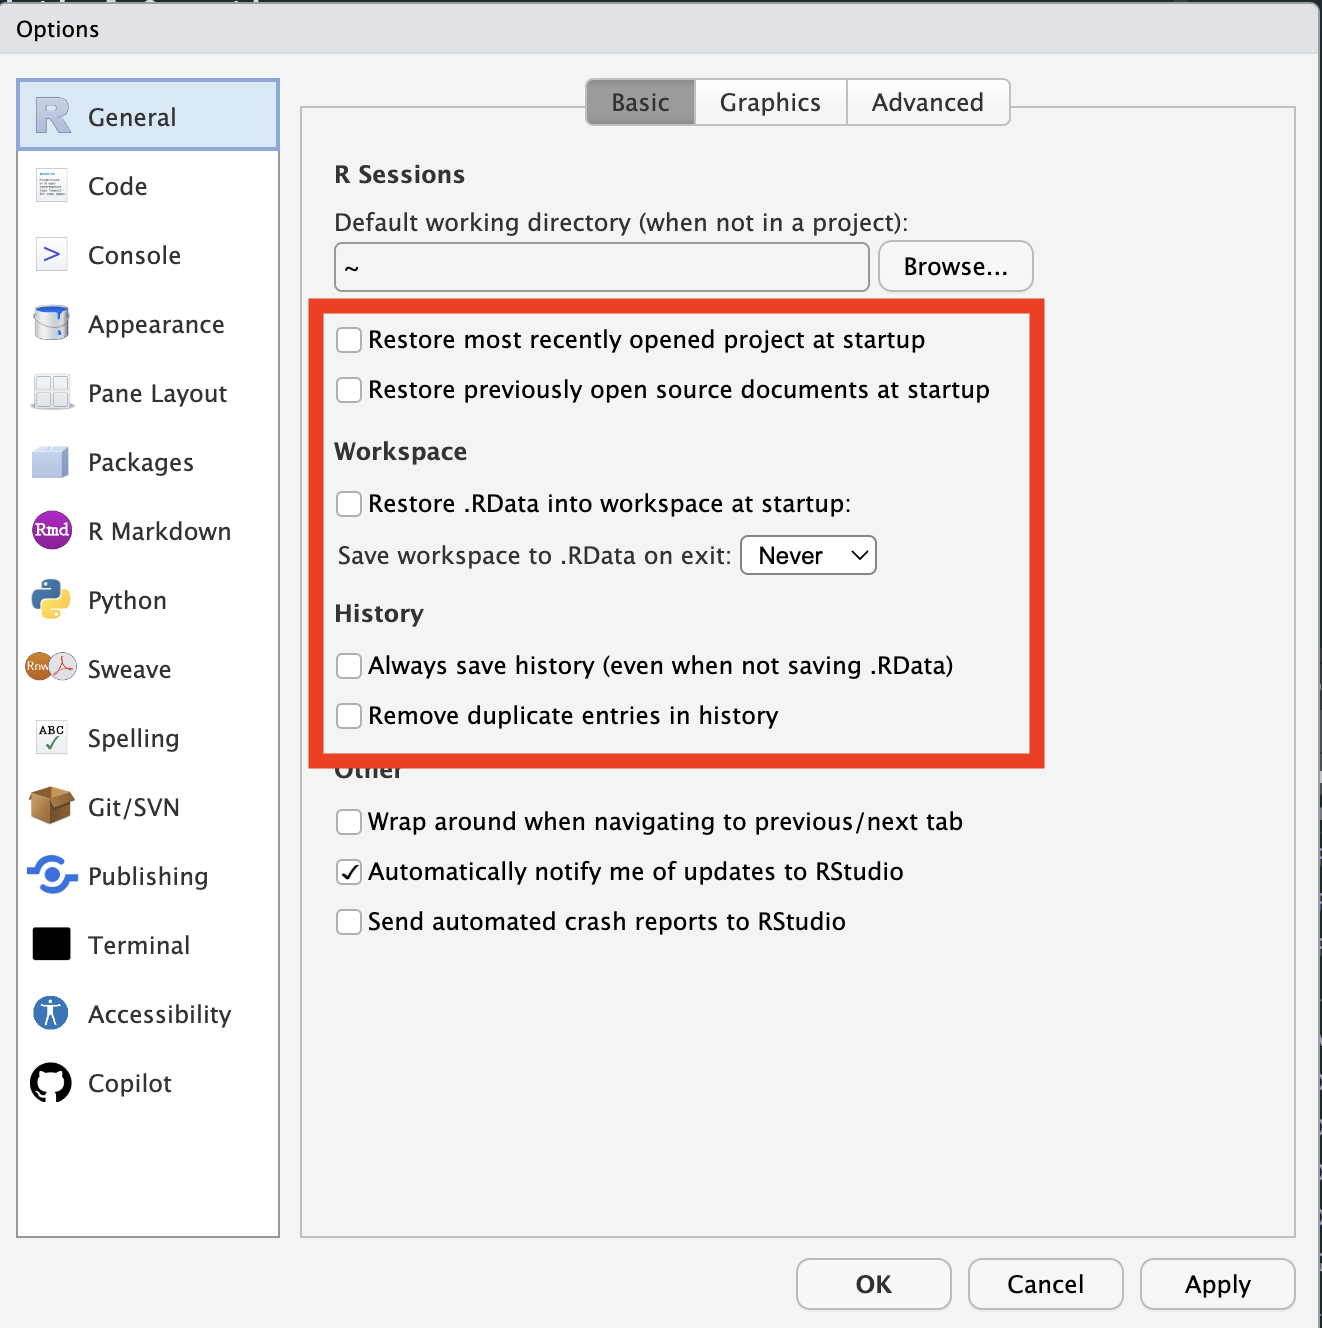
The purpose of these settings is to ensure that you do not save the workspace image or history when you close RStudio, since we do not want to keep any temporary objects or commands that you have used during the session. This is important for reproducibility and to avoid cluttering your workspace with unnecessary files.
Working in projects
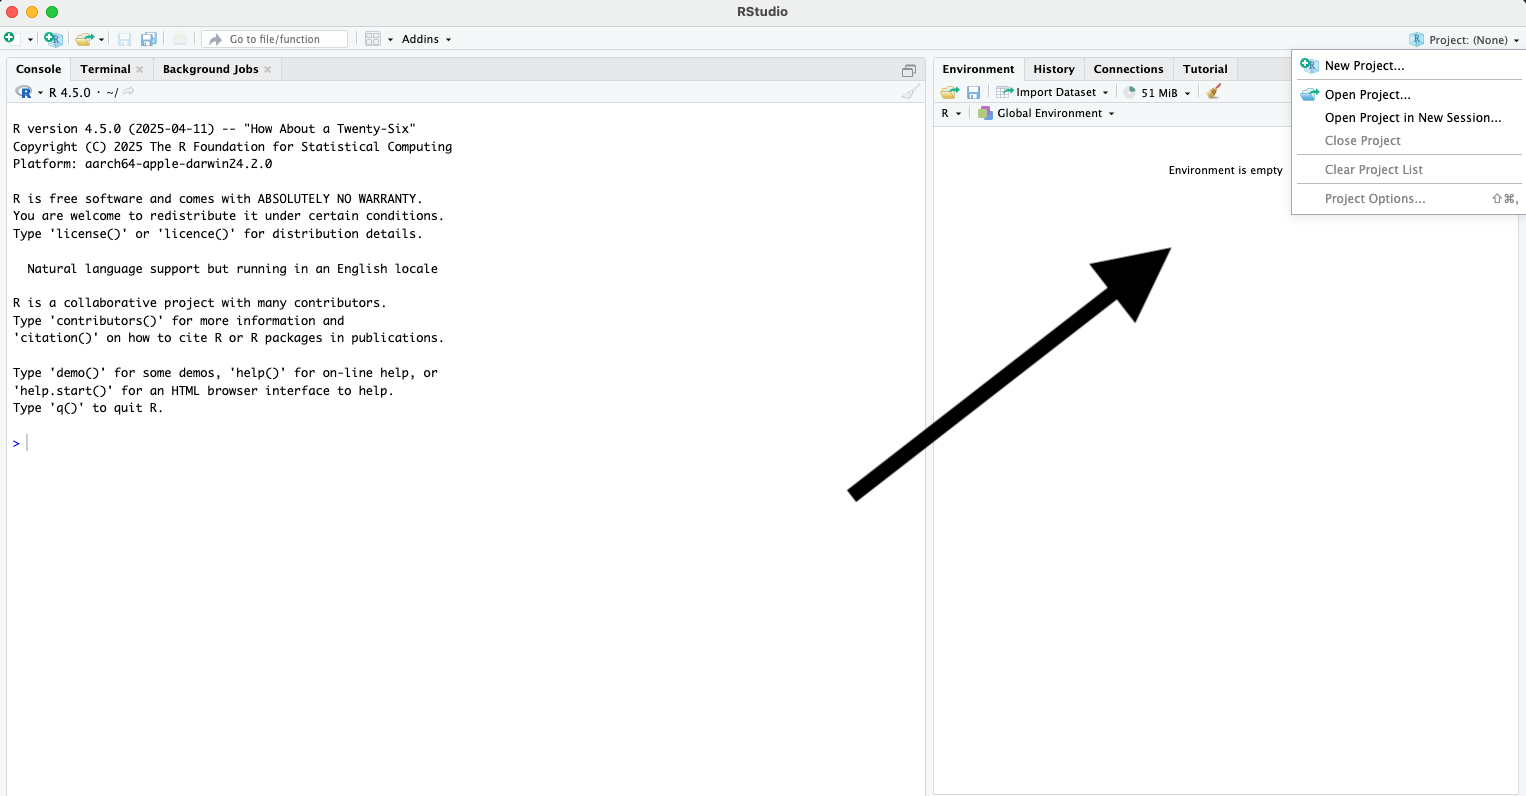
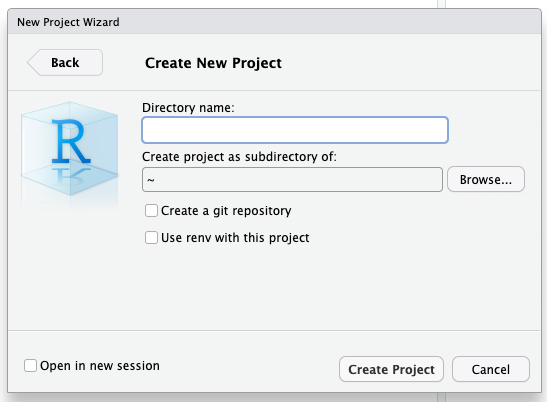
RStudio projects are a great way to organize your work. They allow you to keep all your files, data, and code in one place, making it easier to manage your projects. To create a new project, go to the upper right corner where it says “Project: (None)”. Then choose a location for your project and give it a name (maybe biostat-labs 🤓).
Folder structure
Regardless of the project you are working on, you will benefit from having a well-organized folder structure. The needs may vary depending on the project, but a good starting point is to have separate folders for data, scripts, documentation, and output. This will help you keep your files organized and make it easier to find what you need later on. In this course, we will be assuming you have the following folder structure:
biostat-labs/
├── data/
├── R/
├── docs/
├── output/
├── README.mddata/: This folder can contain raw data, but if you have sensitive data you will likely store it on a secure server. It’s safe to store the data you are working with in this course here, however.R/: This folder contains the scripts you are working on.docs/: This folder contains the documentation for your project. One good way to distinguish this from output is that the docs folder contains files and background information that is not generate by the code you are writing, for example documentation about questionnaires.output/: This folder contains the output of your code, such as figures, tables, and reports. This is where you will save the results of your analysis. Feel free to create subfolders as needed.README.md: This file contains information about your project, such as the purpose of the project, how to run the code, and any other relevant information. It’s good practice to keep this file updated as it is often the “landing page” when others collaborate in your project.